


Quick Answer
Custom dropper design should start with controlled drawings for the bottle, collar, bulb and pipette, followed by tests on the filled assembly. Confirm neck engagement, sealing surfaces, pipette clearance and bulb retention. Record dispensing with the actual formula; bottle capacity, pipette markings or a nominal neck code alone cannot establish fit or dose accuracy.
This guide focuses on component interfaces and the approval record. It does not repeat a general guide to bottle sizes, colors or essential oil packaging. The objective is to make the approved dropper reproducible when components are reordered or production lots change.
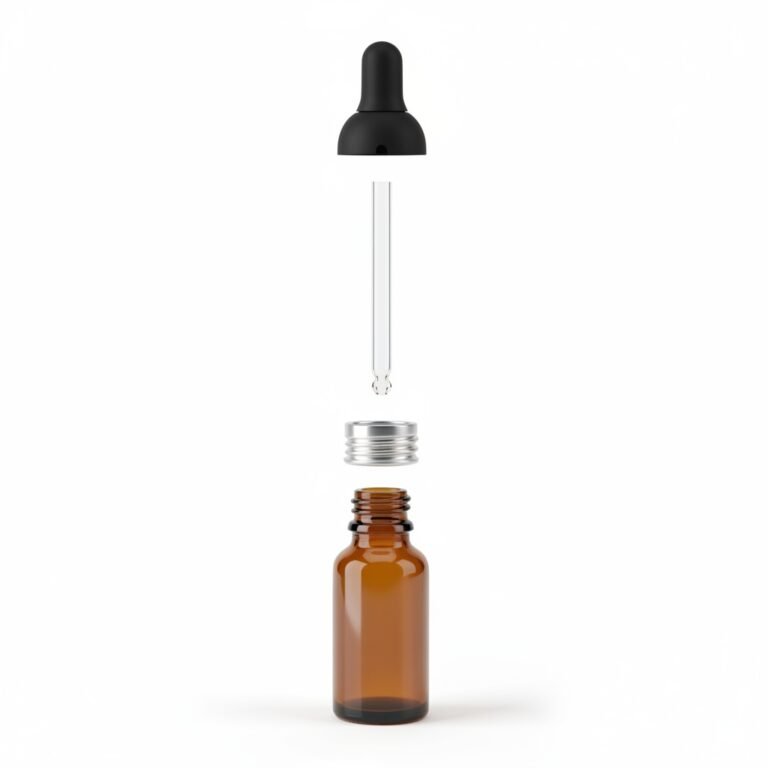
Identify the Assembly Before Quoting
State whether the project uses a squeeze-bulb pipette, a push-button pipette or a separate orifice-reducer closure. These are different systems. A restrictor insert that dispenses directly from the bottle should not be described as though it were a pipette assembly.
Give each component a specification and revision. Identify the bottle neck drawing, collar, sealing element where used, bulb material, pipette geometry and any decoration that affects an interface. Record which supplier is responsible for each part and for final assembly.
Review the Interfaces on Drawings
| Interface | Drawing and sample check |
|---|---|
| Bottle and collar | Neck dimensions, thread engagement, closure seating and the intended application procedure. |
| Collar and bulb | Retention geometry, seating and movement during repeated operation. |
| Bulb and pipette | Attachment, retention and passage alignment. |
| Pipette and bottle | Clearance from the base and walls throughout insertion and closure. |
A common neck designation is a starting reference, not a substitute for the complete dimensions and tolerance requirements. Compare the actual bottle and closure drawings before assuming interchangeability. See the Berlin Packaging neck finish guide for an introduction to the dimensional terms.
Check Pipette Clearance on Real Bottles
Confirm that the proposed pipette does not contact the bottle base when the closure is fully seated. Review off-center insertion and the relevant dimensional variation. A pipette selected only from the bottle’s external height may be unsuitable for its internal geometry.
Balance access to the remaining formula against required clearance. Record the selected pipette length and tip shape on the approved drawing. If a component is changed to improve emptying, repeat the affected assembly and dispensing checks rather than treating the change as cosmetic.
Create a Filled-Assembly Test Record
Use the actual formula and intended fill. Define the method for squeezing, aspirating and dispensing before comparing samples. Record observations rather than promising a fixed number of drops based on the bore size alone.
- Identify formula, component revisions, sample lot and fill quantity.
- Check aspiration, visible bubbles and dispensing under the agreed procedure.
- Record delivered quantity using the agreed measurement method when dosing matters.
- Inspect collar seating, bulb movement and pipette retention after repeated operation.
- Check leakage under the project’s defined storage and handling conditions.
Pipette graduation markings require their own verification if they are used to communicate a measured quantity. Do not convert a decorative scale into a dose-accuracy claim without evidence. Formula flow, surface behavior and the operation sequence can influence delivery.
Separate Compatibility from Fit
A correctly assembled dropper can still be unsuitable for a particular formula. Identify all product-contact materials, including any elastomer or sealing element. Ask the responsible formulation team to define compatibility and stability work on the proposed commercial assembly.
Appearance, odor, component changes and dispensing changes should be recorded according to the agreed test plan. A short bench trial does not establish shelf life, chemical resistance or suitability for every serum and oil.
Keep Reorders Under Revision Control
Retain a signed assembled sample, drawings and test results. Link the approved collar, bulb and pipette revisions to the bottle specification. When a supplier proposes a substitution, identify which interfaces and tests are affected before approving it.
For format options, review dropper bottles. Use the sample approval checklist to capture the complete assembly, or request a component-fit sample review.
Common Questions
Will every dropper with the same neck code fit?
Do not assume so. Compare drawings and validate the proposed bottle and closure combination.
Does a longer pipette improve dispensing?
It may reach more formula, but it must retain adequate clearance. Test the selected geometry on the actual bottle.
Can a bulb material be substituted without review?
No automatic approval should be assumed. Review retention, operation and formula-contact requirements for the proposed change.