


Flip top bottle caps combine a container attachment, a dispensing opening and an attached lid. These interfaces perform different jobs. When a filled bottle leaks or dispenses poorly, identifying the affected interface is more useful than assuming the whole cap needs a stronger hinge or a tighter thread.
Quick Answer
Match flip top bottle caps to the exact bottle neck finish, sealing surface and formula. Check the lid plug, outlet, hinge and latch separately, then evaluate the assembled filled bottle for dispensing and leakage. Repeat opening and closing under agreed conditions. A nominal neck diameter, audible click or PP material name alone does not prove compatibility or a reliable seal.
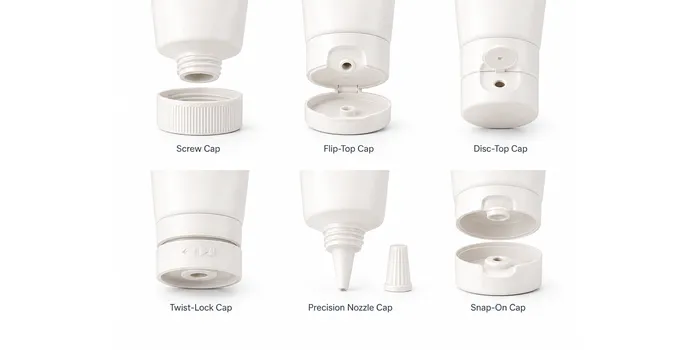
Separate bottle attachment from lid sealing
The cap body attaches to the bottle neck through the specified threaded or snap-on system. At this interface, confirm the neck finish, engagement and sealing surface using supplier drawings and samples. Two components with the same nominal diameter may still use incompatible thread profiles or tolerances.
The flip lid closes over the dispensing opening. Depending on the design, a plug or another sealing feature engages the outlet while a latch retains the lid. A click indicates engagement of a feature; it is not a substitute for a filled-pack leakage test.
Select the outlet using the actual formula
Review dispensing with the formula at the intended use conditions. A smaller outlet may restrict a thick product, while a larger one can make a fluid formula difficult to control. Bottle flexibility, orientation and the user’s squeeze force also influence the result.
Observe the start and end of dispensing: does product emerge cleanly, continue dripping, or remain around the outlet? Check whether residual product prevents the lid from closing fully. Compare different outlet options with the same bottle and formula so that the cap’s effect can be understood.
Evaluate the hinge and latch as user interfaces
The hinge keeps the lid connected, while the latch helps hold it closed. Ask which hinge construction and material grade apply to the actual cap. Do not promise a fixed number of opening cycles based on the polymer name alone; design and processing affect performance.
- Check access to the finger recess and opening effort.
- Verify that the open lid does not obstruct pouring or squeezing.
- Cycle opening and closing using the agreed test routine.
- Inspect whitening, cracks, distortion and latch wear.
- Repeat checks after filled-pack storage and handling.
Evaluate wet or product-contaminated handling if it reflects the intended use. Keep clear acceptance criteria for any change in effort or closure retention instead of relying on a subjective impression that a cap feels premium.
Trace leakage to the correct interface
Check samples upright, inverted and in the agreed transport orientations. If leakage occurs at the bottle neck, examine cap application, neck dimensions and the primary seal. If it occurs at the outlet, inspect lid engagement, plug alignment and product contamination around the sealing area.
Do not respond to every leak by increasing closure torque. Excessive application force can damage a component or make opening difficult. Agree the assembly process with the supplier and filler, then document the actual cap and bottle combination used during the test.
Confirm material and decoration changes
Request specifications for the complete cap, including any separate sealing elements. Test compatibility with the actual product. Changes in fragrance, oils, color masterbatch or recycled content may require a new review rather than automatic approval from a previous formula.
Keep coatings and printing clear of functional sealing surfaces and hinge zones unless the supplier has approved the construction. Recycling and recycled-content claims should reflect the complete pack and intended market; an attached lid is not by itself evidence of universal recyclability.
Prepare a complete closure approval record
Record bottle and cap drawing versions, material specifications, outlet dimensions, assembly method, formula batch and observed results. Retain an approved sample showing acceptable lid alignment and neck fit. Have the filler confirm that line handling will not open or damage the closure before shipment.
For a broader tube project, the hand cream tube packaging guide compares format choices. This article focuses on a bottle closure’s functional interfaces. Send Oulete your bottle neck drawing and closure brief to review model availability and sample matching.
FAQ
Does the same neck diameter guarantee cap fit?
No. Confirm the finish profile, attachment and sealing geometry with drawings and assembled samples.
Does a closed lid make the bottle airless?
No. A conventional flip-top bottle is not an airless dispensing system.
Should hinge and leak tests be performed separately?
Yes, then repeat relevant checks on the complete filled pack to confirm that the interfaces work together.